Showing posts with label loreal. Show all posts

Sunday, February 23, 2014

Piper Polish Confetti Confusion Swatch And Review

Happy Sunday Funday my dears!  Have you been enjoying your weekend?  Yesterday I was cleaning out my closet and found a pair of expensive sunglasses that I thought I lost a few years ago.    I was really sad about losing them, especially because they fit really well on me and cost a pretty penny. Can you imagine how happy I was to see them after so many years?  I'd been meaning to buy some new sunglasses too, and these came back just in time!  When's the last time you found something that you thought you'd long lost?

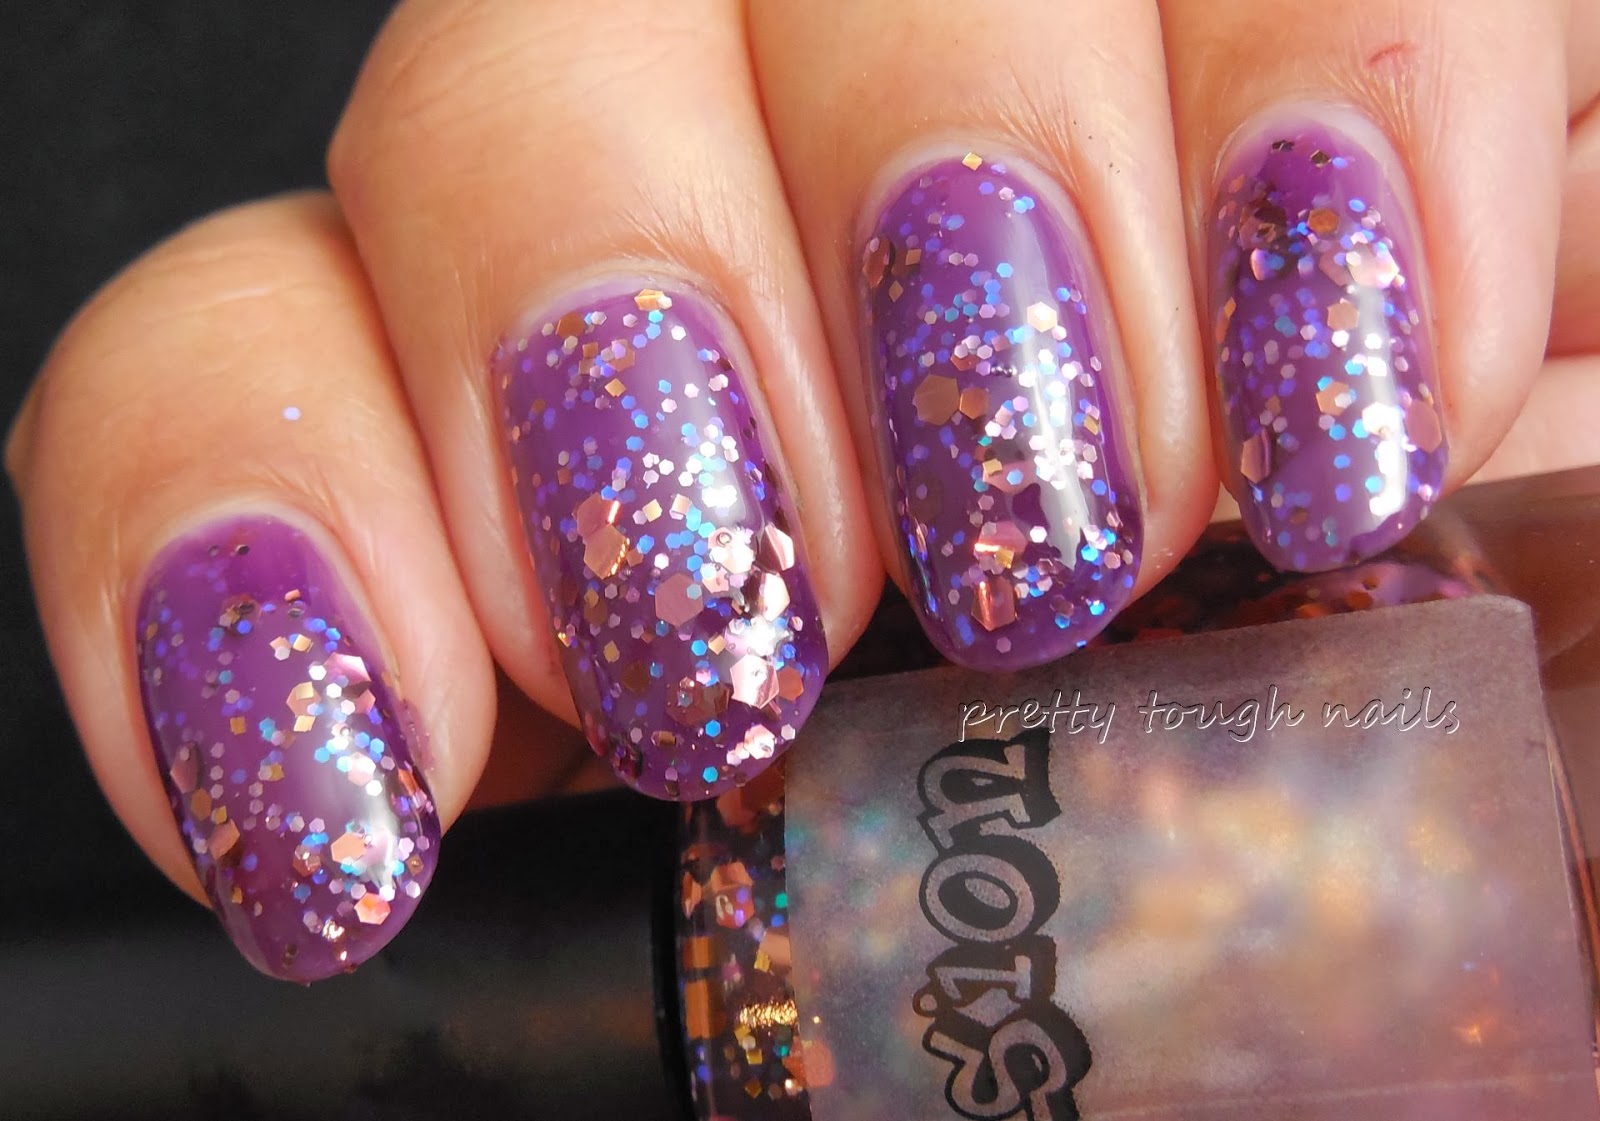
 Today I thought I'd show you another Piper Polish that picked up called Confetti Confusion.  It's a purple jelly based glitter polish loaded with iridescent microglitter and copper multisized hexes and squares.  The jelly base was once again sheer like my previous Piper Polish and difficult to build up so instead I used a coat of L'Oreal Berry Nice first.  I followed that with two coats of Confetti Confusion.  Aside from being sheer, it applied easily with no streaking or stacking of glitter.  I finished with a layer of topcoat to smooth down the glitters and add shine.

Piper Polish Confetti Confusion

Piper Polish Confetti Confusion

Piper Polish Confetti Confusion

Piper Polish Confetti Confusion

Piper Polish Confetti Confusion

Piper Polish Confetti Confusion
What is it about copper glitter that makes any polish look ten times more amazing?  I think the iridescent microglitter compliments the copper beautifully, and the combination would probably work well in any colored base.  I suppose the positive note would be that Confetti Confusion is sheer enough to go over different base colors and look just as deliciously squishy.  Fuchsia or navy maybe?  There's a lot of fun possibilities to be had!

Saturday, December 21, 2013

Christmas Sweater Stamping With L'Oréal Notting Hill Blues

Purchased

Hooray for the weekend! I of course have to work today but that won't stop me from enjoying my weekend.  I hope to finally catch up at work and then do some chores at home afterwards.  On Sunday my parents dock in Long Beach so I'll pick them up and go to OC. They can get some decent Asian food after being on a cruise for two weeks.  Ha!

I can't believe that Christmas is around the corner and I don't feel prepared at all.  To help get me motivated I pulled out a lovely blue by L'Oreal called Notting Hill Blues.  This was released as part of the London 2012 collection and was limited edition.  It's a darker blue than what's in the photos and has a slight shimmer that gives it a glow from within look to it. The shimmer was difficult to capture but I assure you it is there.  Formula was too thin for my taste and made application difficult to control.  The was some streaking but by the third coat it evened out. I added topcoat to give it shine.

L'Oréal Notting Hill Blues

L'Oréal Notting Hill Blues

L'Oréal Notting Hill Blues

Next I used my trusty Zoya Purity to stamp the Winstonia Christmas sweater image onto my nails. I had some trouble lining it up straight but I guess it's passable.  I used Lynnderella Snow Angel on my accent nail and stamped some individual snowflakes to finish.

Christmas Sweater Stamping With L'Oréal Notting Hill Blues

Christmas Sweater Stamping With L'Oréal Notting Hill Blues

Christmas Sweater Stamping With L'Oréal Notting Hill Blues
Not my best work but it definitely has a holiday feel to it.  I really like the shimmer in Notting Hill Blues and I'm compelled to keep it in my collection because I adore the shimmer.  The Winstonia plate is exceptionally well made and easy to use for a stamping novice like me.  I also discovered that my NYC GCS topcoat doesn't smear my stamping as much as my Poshe topcoat does, and it seemed to work again for this mani.  I snowflakes and print remind me of my winter days on the East Coast, especially living in SoCal where one can easily forget that winter exists with its lack of snow and ugly winter sweaters.  Have you been doing any festive nail art for the season?

Purchased

Tuesday, October 29, 2013

Rimmel Black Satin with L'Oréal The Bigger The Better And Halloween Nail Art


I'm still going strong with Halloween themed manis and today's mani starts with Rimmel Lasting Finish Pro Black Satin.  I don't think I've ever tried this line of polish before and I have to admit I was skeptical, especially with a black polish as my introduction.  I anticipated some streaking and patchiness, but fortunately I did not experience either.  I used two coats here and got complete coverage.  The brush was my only difficulty in that it was a super wide brush.  My skinny nails no likey that.  I was impressed at the super glossy finish once it dried. No topcoat here.  Currently, via Nouveau Cheap, this line may be phasing out of the Rimmel collection so grab them quick!  I know they're marked down at Walgreens currently.

Rimmel Black Satin
Rimmel Black Satin

Rimmel Black Satin
Rimmel Black Satin

Rimmel Black Satin
Rimmel Black Satin

Rimmel Black Satin
Rimmel Black Satin

Rimmel Black Satin
Rimmel Black Satin
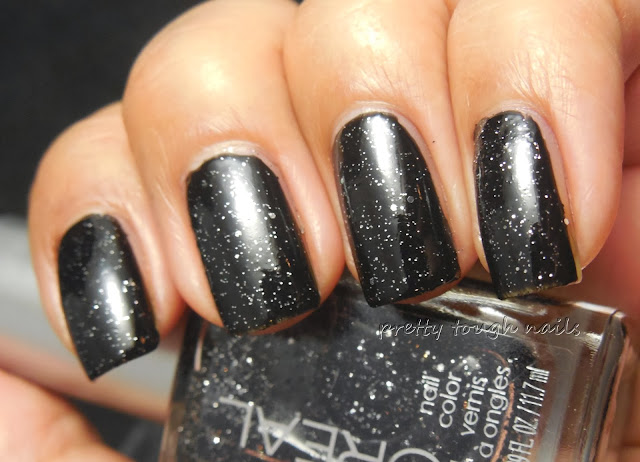
Next to give it some bling, I added a layer of L'Oréal The Bigger The Better a black jelly base with silver microglitter.  I'm not sure if this was a limited edition or part of the core line.  I used two coats here and it dried slightly gritty and matte.  I used a thick layer of topcoat to add shine.

L'Oréal The Bigger The Better

L'Oréal The Bigger The Better

L'Oréal The Bigger The Better

L'Oréal The Bigger The Better
Remember how I loved the googly eyes in my mummy watermarble? Well I decided to try them again with an eyes in the dark themed mani.  I think I may have gone a little overboard with them. I did them with topcoat and then later applied a layer of Essie Matte About You.

Googly Eye Halloween Nail Art

Googly Eye Halloween Nail Art
I still think the eyes are cute despite being a crowd of whatever they are in the night.  I'm not sure if they're little creatures with sharp little teeth or cute little fluffy bunnies.   Just remember, they're watching you!!

Monday, October 21, 2013

Enchanted Polish Vampire Suck Swatch And Review With Blood Drip Nail Art


Good morning loves!  It's still warm here in LA so it doesn't quite feel like fall has taken into full effect yet, but if it's like past years, we'll skip fall and go straight into winter which is shorter days and cold nights.  I'm not looking forward to our rainy season either - I always worry that the roof will leak!  Aside from roof worries, I find that I've been trying to keep up with the clothing trends this season, which I totally have slacked in the past year because of the pregnancy and weight gain.  Have you been bustling up with your fall wardrobe?  What fall staples have you added for this season? 

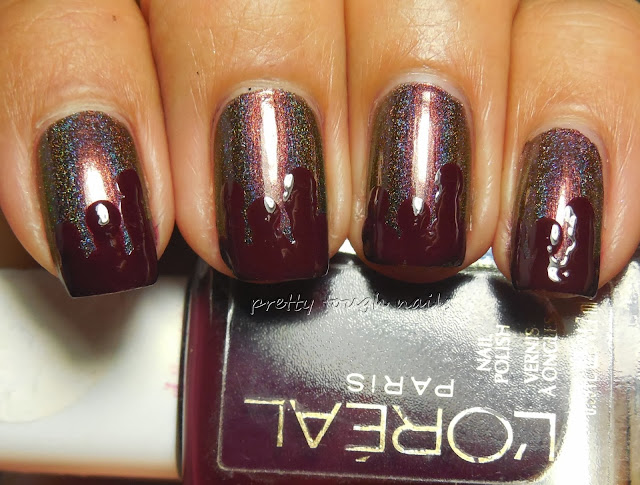
I've got an exciting post for you today, and that's another Enchanted Polish LE called Vampire Sucks.  With a name like that, you know that I couldn't resist trying to capture this elusive beauty during the last restock.  This being the only polish on my wishlist, it wasn't too difficult to get it when the site went live.  Upon arrival, I was delighted to see that the traditional white box Enchanted Polish was replaced with a black box, perfect for this Halloween beauty.  As you'll see, this is a gorgeous brown super strong holo that flashes teal and gold to give it a true oil slick appearance.  It's really mesmerizing to watch the holo rainbows flash across the nail.  Formula was stellar, and probably the best that I've seen from all the Enchanteds I've tried to date.  It flowed effortlessly onto the nail with no pooling or streaking and was nearly opaque in one coat.  I used two coats here with no topcoat.

Enchanted Polish Vampire Suck

Enchanted Polish Vampire Suck

Enchanted Polish Vampire Suck

Enchanted Polish Vampire Suck
 Gah, that teal flash is killer!  I adore this holo more than anything I have in my holo drawer of polishes.  I'm so glad that I beelined to this polish during the last restock.  I don't have any brown holos and I'm a sucker(no pun intended) for dark holos.  Love this so hard!

Next to make this a holiday themed mani, I added some blood drips to the tips with L'Oreal Breaking Curfew, a deep dark brownish red creme with the perfect name to go with this vampirish mani.  I used my largest dotting tool to create the drips and then to connect them together along the tips.

Enchanted Polish Vampire Suck With Blood Drip Nail Art

Enchanted Polish Vampire Suck With Blood Drip Nail Art

Enchanted Polish Vampire Suck With Blood Drip Nail Art
How perfectly vampy is this mani?  I love how the creme contrasts with the holo of Vampire Sucks.  I definitely plan on getting lots of wear with this gorgeous brown holo in the future.  Enchanted hit this one out of the park, and if you're lucky, she'll restock this one again -  I hope!  What's you're favorite holo of all time?

Monday, September 2, 2013

#31DC2013 31 Day Challenge - Orange with L'Oreal Boozy Brunch


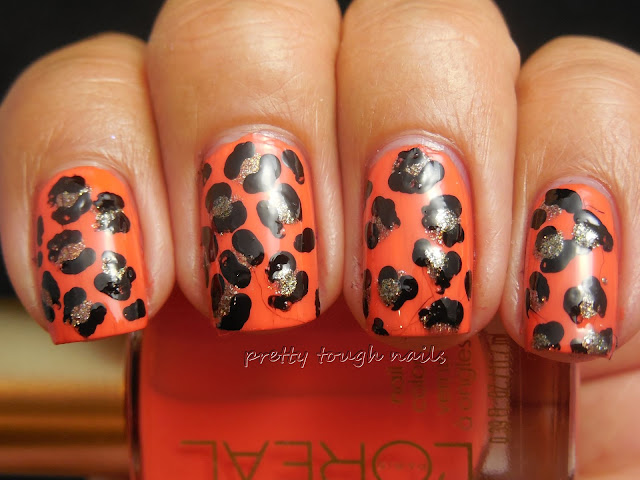
I made it to day two!  That deserves a drink, donchya think?  And what's better than L'Oreal's Boozy Brunch, a bright orange cream that leans a bit crelly.  It makes me think bottomless mimosas, and Labor Day is the perfect day for a nice brunch with one of those.

For this mani I used three layers of Boozy Brunch because it applied a bit streaky with some bald patches.  It didn't even out really well either so a layer of NYC GCS was a must.  It seemed too plain jane on its own so I decided I'd try out freehanded leopard spots for the first time.  Why I did spots and not stripes, I don't know - orange begs for tiger stripes.  I used Jessica Smokey Feather for the silver dots and Wet 'n' Wild black cream for the outlines using a tiny dotting tool.

31 Day Challenge - Orange with L'Oreal Boozy Brunch

31 Day Challenge - Orange with L'Oreal Boozy Brunch

31 Day Challenge - Orange with L'Oreal Boozy Brunch

31 Day Challenge - Orange with L'Oreal Boozy Brunch
Seems like I still need a bit of practice with those leopard spots, but they were easiest enough to do that I don't mind practicing them in the future.  I really like the idea of unusual color combination to create the spots, and it provides a lot of opportunity for crossing off some untrieds on my list.  Do you have any tips for making foolproof leopard spots?


Please check out the other ladies orange manis for day 2 of the 31 Day Challenge!


Wednesday, June 26, 2013

Walgreens Friends And Family Haul and Super Walgreens Review

No swatch post tonight - instead I've decided to post my haul from today's Walgreen's Friends and Family sale.  It was a one day sale that allowed 15% off all items, including sale items.  Normally I wouldn't rush out for this sale, but it coincides with the Sinful Colors 2 for $3 dollar deal plus 500 points(which is $1 value).  I'd been meaning to check out the new super Walgreens on the corner of Vine and Sunset, so this was the perfect opportunity.  From what I understand, there are only a few Walgreens in the country that have a super set-up, and that includes boutique cosmetics by brands such as The Balm, Pop, and Cargo, as well as an extended deli, sushi bar, froyo, and wines/liquor.  I've been to the super Duane Reade's in NYC but never thought the concept would extend to the west coast.  Imagine my excitement when this Walgreens opened up last fall.

On to the pics!  Here are some pics of the boutique nail lacquer displays.

Room view

GOSH Cosmetics

GOSH Nail lacquer closeup

Pop Beauty
The Balm
 I just realized that I should have taken some pics of the deli and froyo section, but aside from it being fairly large and uncommon inside a Walgreens, it wasn't anything special and bordered on being a slight upgrade from a 7-Eleven.

Of note, I was particularly excited about the GOSH cosmetics but after seeing the colors in the display, I was really underwhelmed by the colors.  Most were dupe-able creams, and although there were a few LEs, those looked dupe-able as well.  The only stand-out was Galaxy but I already own that.  I ended up getting only one GOSH LE shade in a dark wine color, a shade that I think is under represented in my collection.

I was pleased to see four Sinful Colors displays, but then realized that they all had similar colors in the same display.  I only purchased four Sinful Colors and then used two $1 off coupons to purchase two L'Oreal polishes that were buy 1 get 1 half off.  With my bottle of GOSH, priced at $7.50, and a Herbal Essence Shampoo marked down to $2.20, I paid about $22 all together.

Here's a pic of my haul, sorry for the blurriness!  There's a bottle missing too.  Oops.  I guess it'll help build suspense for future posts!

My blurry pic of tonight's haul
Overall, it was an interesting visit to the super Walgreens but I'll probably never go back, unless GOSH releases some uber cool LEs.  I'll stick to going to the two regular Walgreens just a few blocks away from my house.  Oh, and don't try the froyo.  It's terrible!

Wednesday, May 1, 2013

L'Oreal Miss Candy Jelly Berry Nice, Jolly Lolly, and Miss Pixie

Today was a long long day for me.  I had to leave work in the middle of the day to care for LO while DH was at a health fair, and then return to work to finish out the day.  I feel like I spent two days at work!  Luckily I have a three day weekend to look forward to so hopefully the week will fly by for me.

Recently, I was able to find some of the L'Oreal Miss Candy Jellies that everyone has been raving about, and I have to admit that they're worth the rave.  The formula and application are pretty good for jellies, and the finish and shine are amazing!  I can't wait to play around with these and try some layering combinations.

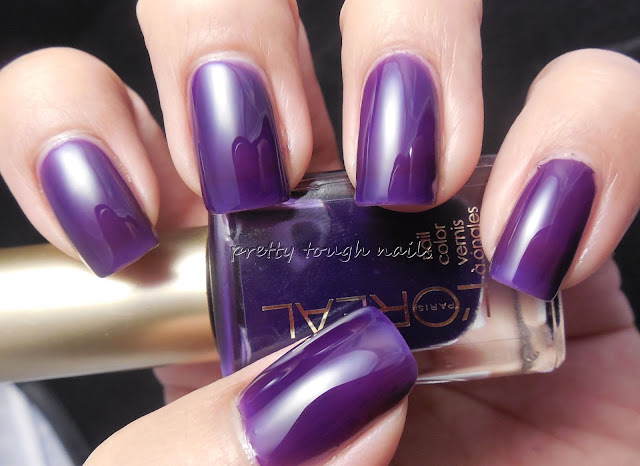
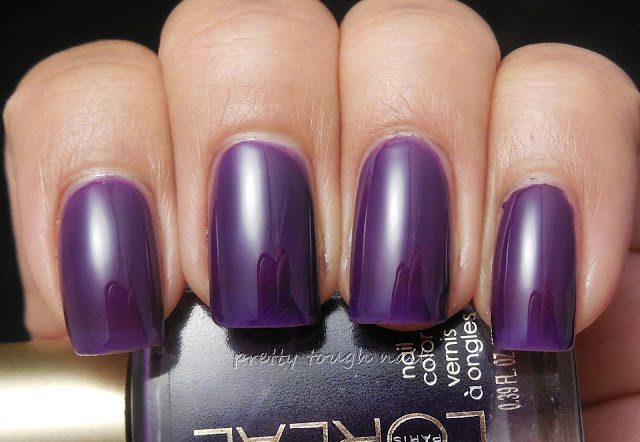
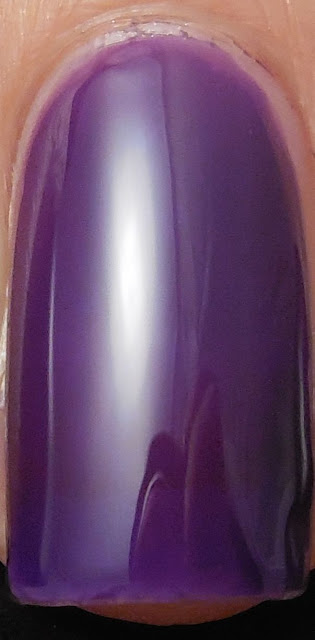
First is Berry Nice, a dark purple jelly that looks black on the bottle but translates lighter on the nail and darkens as you layer it.  I can see this working really well with silver glitter sammiches.  I used four layers in these pics, which is a lot for me but I was trying to minimize VNL.  Each layer dried fairly quickly and I didn't experience any dragging which usually happens with the jellies I've tried before.  No topcoat so you can see its natural shine.  Look how squishy it looks!

L'Oreal Miss Candy Jelly Berry Nice

L'Oreal Miss Candy Jelly Berry Nice

L'Oreal Miss Candy Jelly Berry Nice

L'Oreal Miss Candy Jelly Berry Nice

L'Oreal Miss Candy Jelly Berry Nice

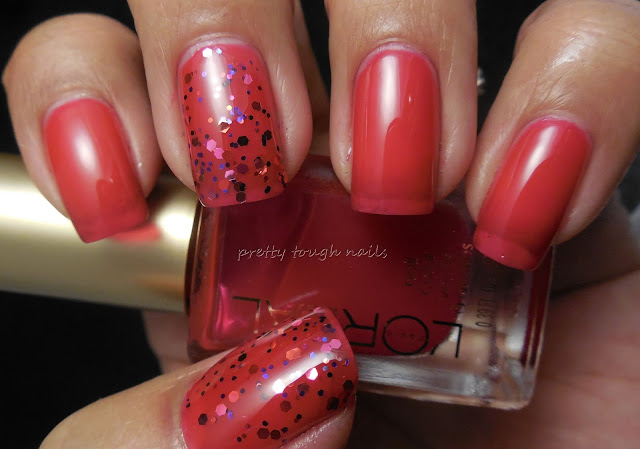
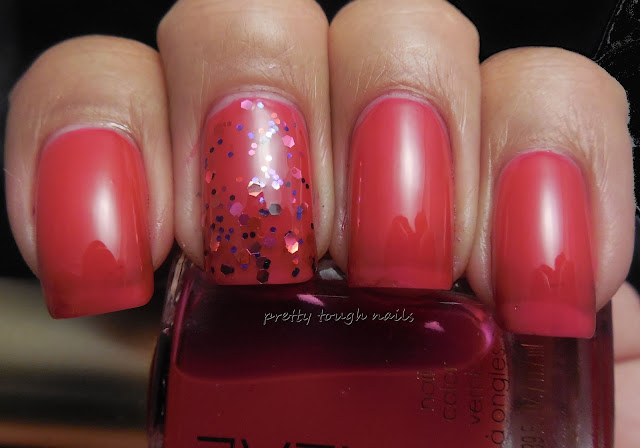
Next is Jolly Lolly, a red jelly that starts out with a pink hue than darkens as you layer it to a bright cherry red.  This is three layers, with a layer of Milani Gems on my ring finger to create a sammich.  No topcoat.

L'Oreal Miss Candy Jelly Jolly Lolly

L'Oreal Miss Candy Jelly Jolly Lolly

L'Oreal Miss Candy Jelly Jolly Lolly

L'Oreal Miss Candy Jelly Jolly Lolly

L'Oreal Miss Candy Jelly Jolly Lolly with Milani Gems Sammich

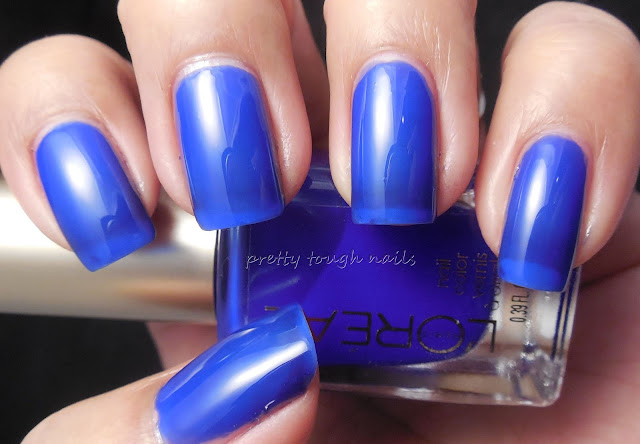
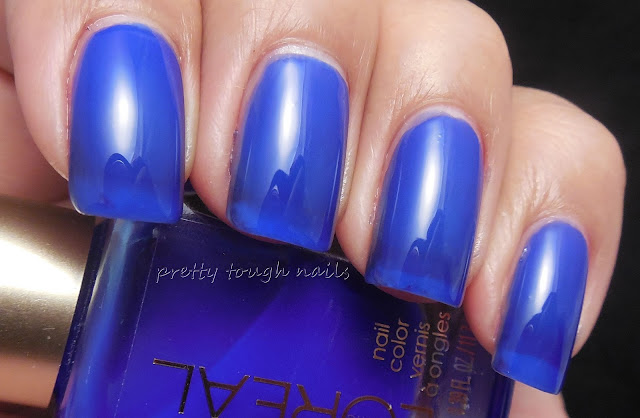
Finally I have Miss Pixie, and in my humble opinion, the star of the bunch.  It's a stunning royal blue jelly that I think other brands have tried to create but never hit the mark.  Below is four layers with no topcoat.

L'Oreal Miss Candy Jelly Miss Pixie

L'Oreal Miss Candy Jelly Miss Pixie

L'Oreal Miss Candy Jelly Miss Pixie

L'Oreal Miss Candy Jelly Miss Pixie

For fun, I tried an ombre with Miss Pixie by using one layer on my pointer, two layers on my middle, three on my ring and four on my pinky.

L'Oreal Miss Candy Jelly Miss Pixie Ombre

I can see these making a home in my permanent collection and becoming useful for when I want to get creative with layering and making sammiches.  The formula on all of these were excellent and they really make jellies a joy to work with.  The shine is awesome on these as well, no topcoat needed and there's a lot of depth and squishiness when dry.  If you can find these, definitely pick them up.  I found a display at my local Walgreens and Rite-Aid and waited until they were on sale to purchase.  Are you a fan of jellies?